
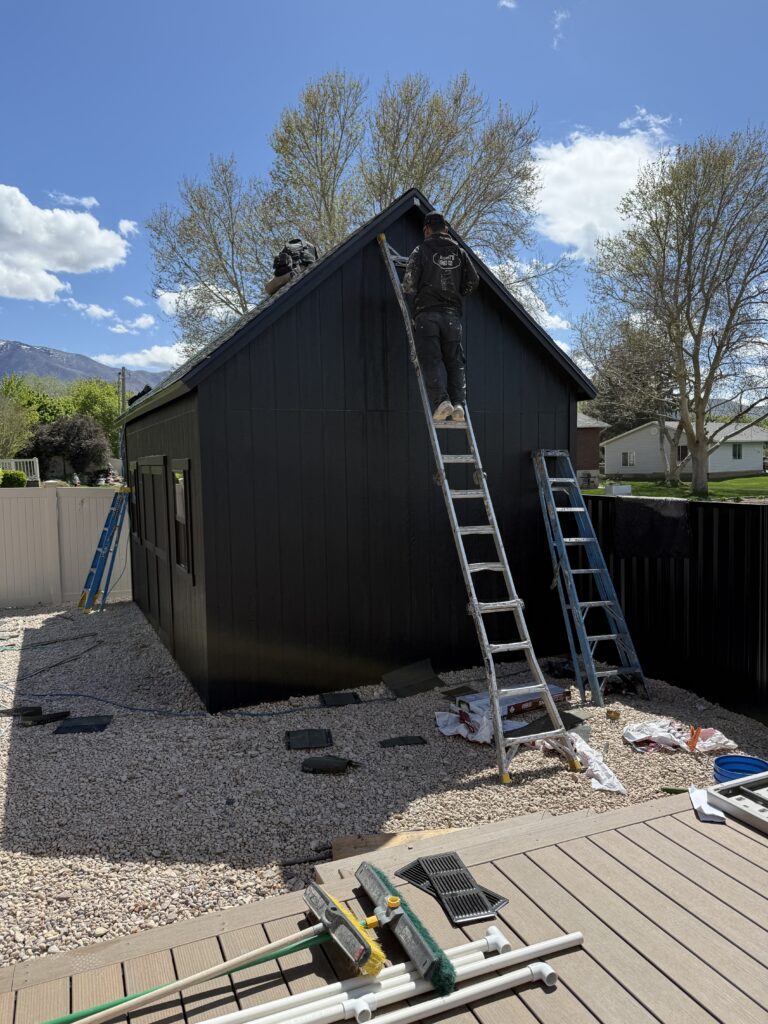
SHED REVEAL: our 12×18 custom shed + Full Cost Breakdown
When we started planning this shed, I knew I didn’t want it to feel like an afterthought in our yard. My goal was to design something that felt intentional — like a natural extension of our home.
And now that it’s finished… it does exactly that.
This is our 12×18 custom shed, and I’m sharing the full breakdown — what we chose, what we upgraded, what it cost, and how I’m planning to style it next.
The Vision
Most sheds feel purely functional and while thats important I wanted this space to feel Elevated, Cohesive, and Visually aligned with the rest of our home.
That meant focusing on:
- Proportion and scale
- Roofline and structure
- Natural light
- Exterior finishes
These are the same principles I use in full home design — just applied to a smaller structure.
The Cost Breakdown
We paid out of pocket for this project (not sponsored), and here’s exactly where the investment went:
— Base shed: $6,399
— Wall height upgrade (9 ft): $639
— Windows 2×3 (2): $806
— Double door : $350
— Roof pitch upgrade (10/12): $959
— Overhangs: $275
— Paint: $767
— Vents + details: $140
— Spring discount: -$450
TOTAL: $10,604 + Gravel (8 yards $950)
What Was Worth It-
If you’re planning something similar, these are the upgrades that made the biggest difference:
Wall Height (9 ft)
This alone changed the entire feel. It instantly looks more custom. I think this was the perfect height, we could have chosen 10 ft but 9 ft was best.
Roof Pitch Upgrade
Gives it a more architectural, high-end look.
Windows
Natural light = everything. I would not skip this.
Paint
This is what ties it back to your home and makes it feel cohesive. Benjamin Moore Exterior satin finish, color is TRICORN BLACK
Gravel grounding layer
What I’d Do Differently
A few things I’d think through earlier next time:
- Mapping out landscaping at the same time as the build
- Thinking through electrical earlier if adding lighting later
Nothing major — but details matter.
What’s Next: Styling the Shed
This is where it really comes to life.
Over the next couple months, I’ll be layering in elements to turn this into a full outdoor space.
Planter Boxes
These will ground the shed and soften the structure.
Shop options I’m considering:
Trellis + Greenery
This will add height, texture, and bring life to the space.
Shop options:
Outdoor Lighting
Lighting is what will make this space feel finished and elevated — especially at night.
Shop options:
Future Pergola
We’re planning a pergola + rail build on the deck this summer that will connect the entire space and create a true outdoor living area.

Shop This Project + Design Tips
A curated selection of pieces I’m using (and planning to use) to bring this shed to life. I’ll continue updating this as the space evolves 🤎
- Planter boxes– large rectangular planter… Scale matters here — go larger than you think for a more custom look
- Gravel– grounding layer, we used 3/4 inch gravel
- Outdoor string lights– warm LED lights, the exact vibe I’m going for, Lighting is what takes this from “nice” to fully finished at night.
- Trellis panels (wood or metal)
- Climbing plants (fast growing option, evergreen option) This is what softens the structure and makes it feel integrated, not standalone.
- Exterior paint color and trim… Benjamin Moore TRICORN Black exterior satin finish paint
- Future pergola inspiration, more on this later.
- Future Styling- I’ll link everything I use as I finish styling the space
Final Thoughts
This project is a reminder that even the most functional spaces can feel intentional and elevated with the right design decisions.
And we’re just getting started.
I’ll be updating this post as the space evolves — so you can follow along and shop each phase as it comes together.
any questions? let me know below in comments + I would love to know what outdoor projects you are planning this summer 🙂
xx tana
0 comments